A failed firestop inspection is rarely caused by one obvious mistake. More often, it is the result of penetrations added after the original installation, an unapproved sealant substitution, oversized annular space, or incomplete records that leave the inspector unable to verify the system. This firestop rework recovery example shows how a disciplined correction plan can restore compliance without allowing a life-safety issue to become a critical-path problem.
Consider a mid-construction commercial project approaching above-ceiling close-in. During a pre-inspection walk, the team finds several rated wall penetrations that no longer match the installed firestop conditions. Electrical conduits have been added, a sleeve is not properly treated, and joint details at a mechanical-room wall are inconsistent. The work cannot simply be patched with more material. Each opening must be evaluated against a tested, listed system before corrective work begins.
The Firestop Rework Recovery Example: What Was at Risk
The immediate concern is not just a failed inspection. Firestopping is part of a rated assembly intended to limit the spread of fire, smoke, and hot gases through penetrations and construction joints. If the penetrant configuration, opening size, wall type, backing material, and firestop product do not align with a tested system, the assembly may not perform as intended.
For the general contractor, the operational consequences can move quickly. Ceiling installation may be held, other trades may lose access, an AHJ review can be delayed, and closeout documentation becomes harder to reconcile. Rework completed without a clear system selection can create a second round of corrections, which is where schedule pressure often drives poor decisions.
In this example, the superintendent needs a recovery plan that does four things at once: identify every affected condition, select compliant UL-listed systems, complete corrections in a workable sequence, and produce records the inspection team can review with confidence. The objective is not to make the penetrations look finished. The objective is to return each rated assembly to a documented, inspection-ready condition.
Step 1: Stop Guessing and Define the Actual Conditions
The recovery starts with a field survey. A qualified firestop team walks the affected floors with project drawings, rated wall information, and access to the relevant tested systems. Each condition is documented by location, wall or floor rating, penetrating item, opening dimensions, existing firestop material, and visible deficiencies.
This step matters because similar-looking penetrations can require different systems. A steel pipe through a gypsum wall is not evaluated the same way as bundled communications cable, insulated copper tubing, plastic pipe, or a mixed-penetrant opening. The construction of the barrier also matters. Concrete, concrete masonry unit walls, shaftwalls, and gypsum assemblies have different tested-system requirements.
The team should also identify whether the condition is a penetration, a perimeter joint, a head-of-wall joint, or a construction joint. These systems are not interchangeable. Applying a penetration sealant to a dynamic joint, for example, does not establish compliance just because the product is firestop-rated.
At this stage, the best recovery teams distinguish between conditions that can be corrected in place and conditions that need partial removal. If existing material is incompatible, poorly adhered, contaminated, or obscuring the opening geometry, it may need to be removed so the approved system can be installed exactly as tested. That can feel slower in the moment, but it prevents cosmetic repairs that fail at the next inspection.
Step 2: Match Every Condition to a Listed System
Once the field conditions are confirmed, the recovery plan moves from observation to engineering-supported system selection. The selected UL-listed assembly must account for the rating of the barrier, the penetrant type and size, the allowable annular space, the required fill materials, and the specified firestop product.
A compliant solution may use STI or Hilti firestop products, but the brand of material alone is never the answer. The applicable listed system governs the installation. Product data sheets, UL system details, manufacturer requirements, and project specifications must work together. Where the as-built condition does not match a standard system, the contractor may need a manufacturer engineering judgment or a revised, approved detail before proceeding.
This is a critical decision point. An engineering judgment can be appropriate for a condition that falls outside available tested systems, but it should not be treated as a shortcut for a condition that was simply not surveyed carefully. The documentation must be project-specific, supported by the manufacturer, and accepted where required by the design team or AHJ.
For projects with numerous conditions, a correction matrix is useful. It assigns each issue a location, deficiency, approved system or engineering judgment, responsible trade coordination item, installation status, and photo record. That gives the project team one source of truth instead of scattered email threads and marked-up photos.
Step 3: Build the Work Sequence Around Access and Trade Coordination
Firestop recovery work is often performed in spaces where access is already shrinking. Ceilings may be queued, ducts may be installed close to walls, and multiple trades may need the same corridor or mechanical room. A recovery plan must therefore be coordinated like any other critical-path activity.
In this example, the team divides corrections into zones. Conditions above ceilings are completed before close-in, mechanical-room penetrations are addressed during scheduled trade access, and inaccessible locations are flagged for immediate coordination with the responsible contractor. The superintendent receives a daily status update identifying completed locations, unresolved field conditions, and any access constraints that could affect the schedule.
The firestop contractor should not assume responsibility for modifying another trade’s work unless that scope is clearly assigned. A conduit may need to be repositioned, a sleeve may require correction, or excessive cable fill may need to be addressed before a listed system can be installed. Clear handoffs prevent a firestop crew from arriving at an opening that remains physically incapable of receiving the selected system.
Speed matters, especially when inspections are scheduled. But hurried installation introduces avoidable failures: incorrect backing depth, missing mineral wool, inadequate sealant depth, unsealed cable gaps, or labels and identification that do not match the completed work. Field-ready crews should work efficiently without departing from the tested detail.
Step 4: Install, Inspect, and Document Before Calling for Reinspection
Corrective work should be inspected internally before the project requests a formal reinspection. That means comparing the installed condition to the approved system, verifying material depth and configuration, confirming adhesion and backing requirements, and checking that the penetrant arrangement has not changed since the survey.
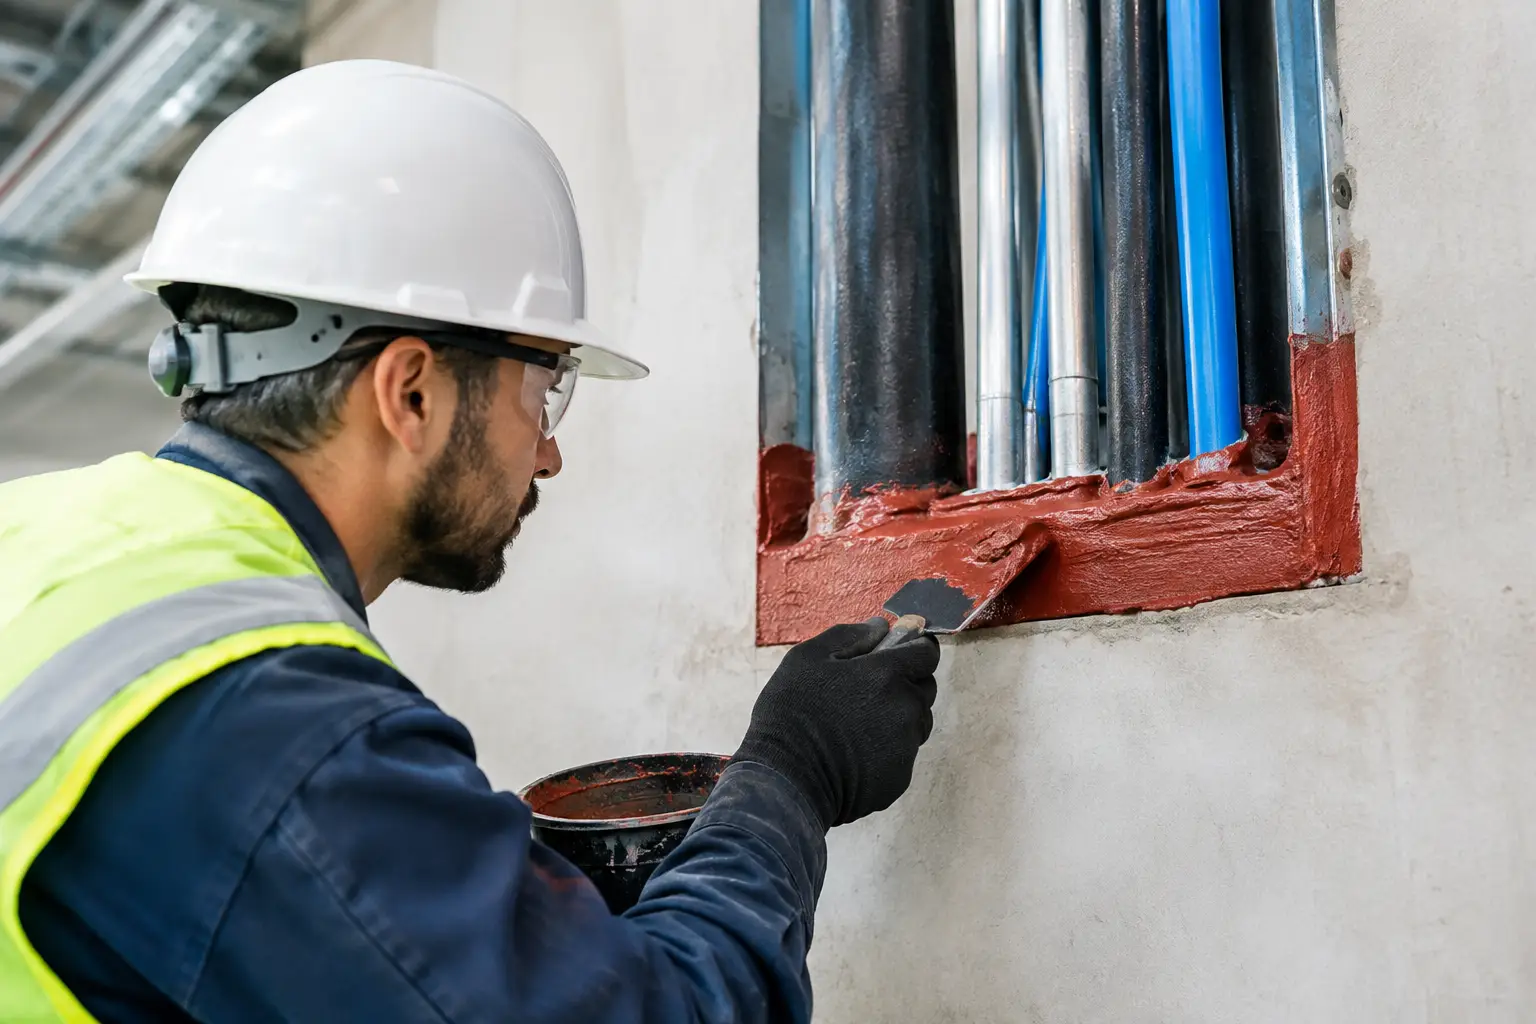
Photo documentation should show enough context to be useful. A close-up of red sealant alone does not prove compliance. Good records identify the location, reveal the penetrant and rated barrier, show the complete installed condition, and connect the work to the selected UL system or approved engineering judgment. Labels, system references, and penetration identification should align with the project closeout requirements.
Colonial Fireproofing approaches this stage as an inspection-readiness process, not paperwork after the fact. Certified oversight, manufacturer-compliant installation, and clear records help the general contractor demonstrate that corrective work was completed deliberately and traceably.
The final review should include the areas corrected as well as adjacent work. Rework can reveal a broader coordination issue, such as late penetrations across an entire floor or inconsistent sleeve installation by a trade partner. Finding that pattern before the inspector does is often the difference between one focused recovery effort and a recurring project delay.
Why Firestop Recovery Efforts Commonly Fail
The most expensive recoveries usually fail for predictable reasons. The team starts installing before confirming the rated assembly, assumes one listed system covers every variation, or relies on a familiar product instead of the tested detail. Documentation then becomes an afterthought, leaving the project unable to explain what was installed or why.
Another frequent issue is treating the inspection notice as the start of the process. By the time an inspector identifies widespread deficiencies, access may be restricted and the schedule may have little flexibility. A pre-inspection review gives the project team time to coordinate corrections while affected locations are still accessible.
There are also legitimate situations where the recovery path depends on the AHJ, design professional, or manufacturer. Existing construction may conceal materials, project specifications may impose requirements beyond a basic listed system, or a unique opening may require an engineering judgment. Accountability means identifying those limitations early rather than promising an instant repair that cannot be properly supported.
Turn the Recovery Into a Better Closeout Process
A successful correction plan should improve the remainder of the project. Once the team sees where conditions went off track, it can establish hold points before ceiling close-in, require trade notification before new penetrations are added, and maintain a current penetration log by area. Those controls are simple, but they reduce the chance that completed firestop work is disturbed or bypassed later.
For commercial teams working under real jobsite pressure, the lesson is straightforward: firestop rework is recoverable when it is treated as a technical life-safety scope, not a quick sealant task. Survey the actual condition, select the approved system, coordinate access, install to the detail, and document the work before inspection. That discipline protects more than a date on the schedule. It protects the rated assemblies the building will rely on when they matter most.